How to use google app scripts
Categorías : JavaScript, HTML, Programación, Google app scripts.


Google has a huge collection of tools which allow developers interact with its services.
One of my favourites is the Google App Scripts. This a great tool that allow us to develop software that can work together with the most Google common services, as Gmail, Calendar, Drive, Maps, Translator, etc. Actually, this is very similar to an API, but in my opinion, what Google people are offering here is something more powerful, and easier to use, than the Google APIs.
However, we can always use the Google APIs with the same aim, but for non complex aplications I think it is better to use “Google App Scripts”.
To work with “Google App Scripts” we need a Google account. So all the references to the Google Services we are going to use, are going to point to the ones of the logged session in the browser.
“Google App Script” can be used in several ways. We are not going to talk about scripts integrated into the Google services. Rather we are going to suppose that we have a personal Web App, and we want to link it to one of our Google services.
At this point, we have 2 choices:
- We can create our Web App completely as a “Google App Script”.
- Or we can create a Script, and use it as an API, requested from another Web App.
We’re going to start with the first case.
Create a Web App Script
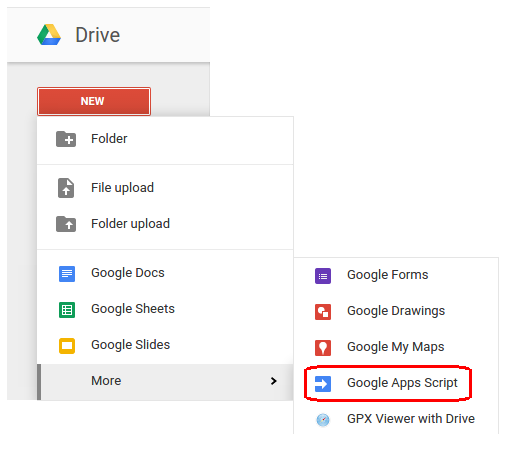
We can write and host a whole html dynamic page with google services. The only thing we need, is a google account with a Google Drive service. The project will be stored as a file into your Google Drive unit. So you can create one directly with the Drive New File button:
or going directly to this URL: https://script.google.com
Both cases, we’ll get the start wizard, where there are many options, but what we are looking for is the last of the left column «Web App»
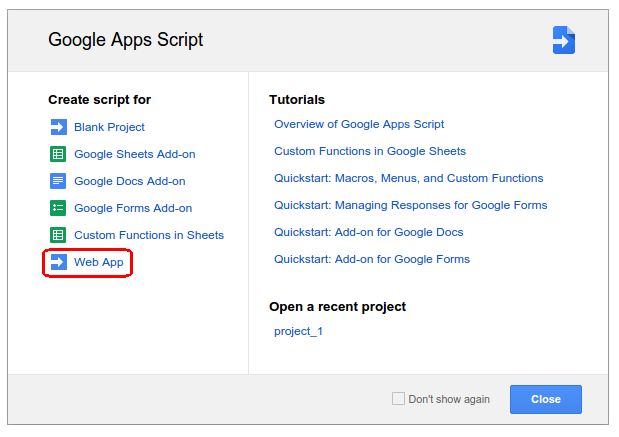
After choosing, we’ll get that framework with an implemented example :
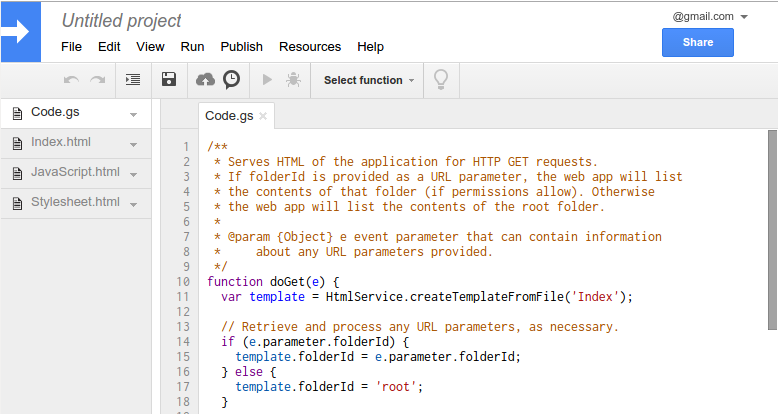
As you can see, the project has 4 files :
- Code.gs : Here we must write our Google App Scripts. With this functions we can bind our javascript code with Google Services.
- Index.html : This is the main html file of our web page.
- Javascript.html : Here we can write the javascript code for our web app.
- Stylesheet.html : Here we can write the CSS styles for our web app.
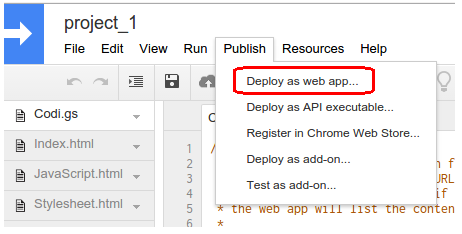
Let’s try to execute the project:
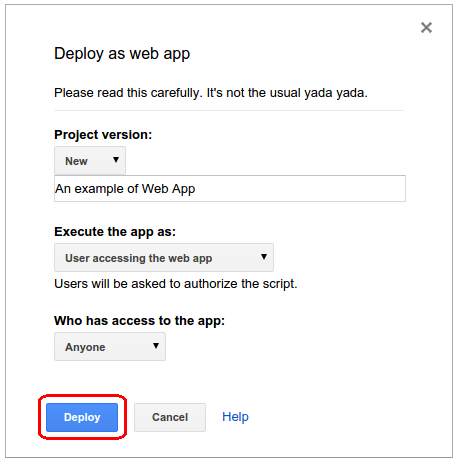
Go to the menu → Publish → Deploy as a web app
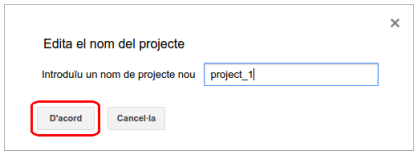
Choose a name for the project (f.e. project_1).
Select the Project options and access permissions.
-
And then we’ll get an URL, ended with “/exec“, like this «https://script.google.com/macros/s/[…ID…]/exec».
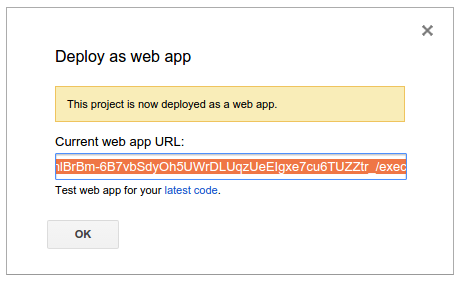
This URL contains de ID of the Web App. You can change the last part of it in order to work with it. The possible endings are:
- /exec : With this URL, you will send the request for the published version of the Web App, and get the HTML main page.
- /dev : With this one, you will also send the request, but rather than the last published version, you’ll get the currently developed version of the Web App.
- /edit : With this one, you will be redirected to the “web framework” where Google allows to develop the Web App..
If we try to go to the /exec url (in a new browser window), the first time we try to launch the app, Google will ask us to grant it. So give it permission.

And finally we will get the result page. The example Web App shows a list with the name of our 20 first files in our Google Drive main folder.

Let’s going to see how does it work.
Initial funcion doGet()
When we launch the a GET request URL (ended with /exec), the first what Google executes is the «doGet(e)» function, stored in the Code.gs file
function doGet(e) {var template = HtmlService.CreateTemplateFromFile('Index');// Rretrieve and preocess any URL parameters, as necessary.if (e.parameter.folderId) { template.folderId = e.parameter.folderId; }else { template.folderId = 'root'; }// Build and return HTML in IFRAME sandbox modereturn template.evaluate().setTitle('Web App Window Title').setSandboxMode(HtmlService.SandboxMode.IFRAME);}
We can pass “GET parameters” to this function, collected in the “e” main parameter. For example, if I called the URL with https://script.google.com/macros/s/.../exec?fold4erId=id001“, we could read (in the doGet function) the folderId value as e.parameter.folderId.
After recieving the GET request, it constructs a template object, taking the “Index.html” template file with the HtmlService.createTemplateFromFile() function.
If there’s a “folderId” parameter into the URL, it passes this value to the template variable, or ‘root’ value if not. It means that everywhere where there’s a <?=folderId?> in the template code, will be translated by the same value we’ve given to it.
And then, the template object launches 3 methods and returns the result.
- With the setSandboxMode(), the result web page is served into an iFrame structure, as a sandbox, in order to protect the client browser to execute malicious javascript code.
- With setTitle(), we can set a Window title.
- With evaluate(), the template code is evaluated, converted and returned as a final HTML code.
As you must have realized, this doGet() function only return an HTML code for our main page. We could write a simpler function like that :
function doGet(e) {return HtmlService.createHtmlOutput('<html> <body> <p> Hello World </p></body> </html>');}
and after the URL request we would get this simple html page.
Template file Index.html
Now, let’s take a glance to the Index.html template file :
<!DOCTYPE html><html><head><base target='_top'><?!= HtmlService.CreateHtmlOutputFromFile('Stylesheet').getContent(); ?><script> var folderId = <?= folderId ?> </script><?!= HtmlService.CreateHtmlOutputFromFile('JavaScript').getContent(); ?></head><body><h1> Google Drive Explorer - Folder <?= folderId ?> </h1><h1 id='main-heading'>Loading...</h1><div class='block result-display' id='results'><div class='hidden' id='error-message'> You have no permission </div></div></body></html>
As you can see, there are some <?= folderId ?> template tabs, which as we know they will be overwritten with the URL parameter value.
However, there are also another <?!= HtmlService.createHtmlOutputFromFile(‘[file name]’).getContent(); ?> template tabs.
When the template is evaluated, the createHtmlOutputFromFile('') function creates a new HtmlOutput object, and loads all the html content of the file into the final html page result. So, in this case, it takes the ‘Stylesheet.html‘ and ‘Javascript.html‘ files, and loads all their content into the final served page.
<!DOCTYPE html><html><head><base target=”_top”><!-- [All the Stylesheet.html content] --><script> var folderId = 'root'; </script><!-- [All the JavaScript.html content] --></head>…</html>
If you wish, you can add more files, to make your application more modular. For instance, if you have to add a jQuery-UI custom library, you can add the file to the project :
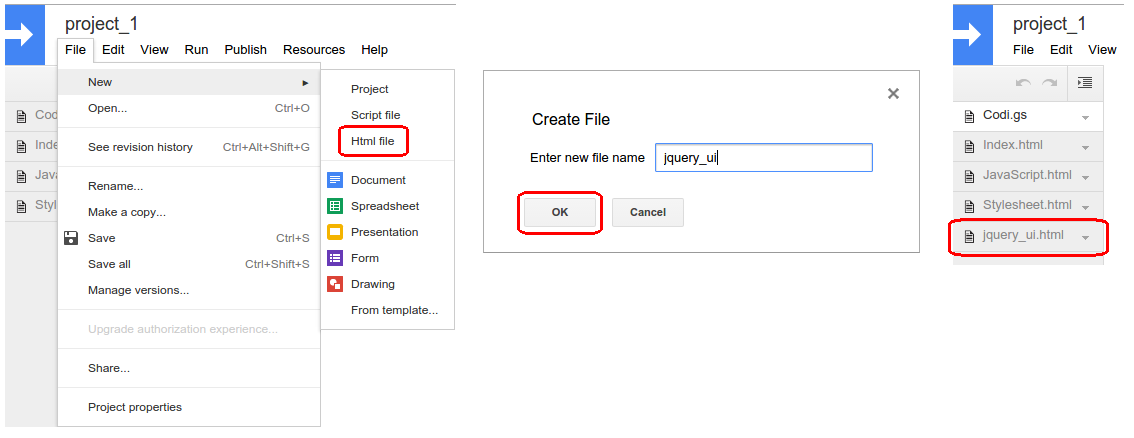
and then, insert this code into the header of the main page :
<?!= HtmlService.createHtmlOutputFromFile('jquery_ui').getContent(); ?>
Bind Google Scripts with Javascript.
Now that we have the static page, let’s see the dinamic part.
Opening the «JavaScript.html» file, we can find this:
<script str='//ajax.googleapis.com/ajax/libs/jquery/1.9.1/jquery.min.js'></script><script>$(function() { // Call the server here to retrieve any information needed to build the page.google.script.run.withSuccessHandler(function(contents) { // Respond to success conditions here.updateDisplay(contents);}).withFailureHandler(function(msg) {$('#main-heading').text(msg).addClass('error');$('#error-message').show();}).getFolderContents(folderId);});function updateDisplay(contents) {var headingText = 'Display contents for' + contents.rootName + ' folder:';$('main-heading').text(headingText);for (var i = 0; i < contents.children.lenght; i++) {$('#results').append('<div>' + contents.children[i] + '</div>');}}</script>
First of all, we can realize that we’re going to work with a jQuery framework, therefore there is a library link at the top.
Then, we can see the $(function() {}) declaration. As you may know, this is the way (or one of them) to implement the short document onready function in jQuery. That means that it will be executed when the page is loaded in the browser.
So, when our page is loaded in the browser, this javascript will call automaticaly the “google.script.run” method, that binds the javascript client side code with de Google Script in the server.
In order to use this method, we must to declare :
- getFolderContents: The “Script” function to be called (into the Code.gs file). In this case, we’re going to call the getFolderContents() script function.
- withSuccesHandler: This is the handler function that will be called after the script function, if all goes ok.
- withFailureHandler: This is the handler function that will be called after the macro function, if anything goes wrong.
As you can see, if the macro function goes wrong, we’ll load and show the error message into the “error-message” div, giving the apropiate style to it.
Before understanding the succes handler, we must to see how the Google Script.
So, let’s open the Code.gs file again, and look to the getFolderContents() function :
function getFolderContents(folderId) {var topFolder;var contents = { children: [] };if (folderId == 'root') topFolder = DriveApp.getRootFoolder();else topFolder = DriveApp.getFolderByID(folderId);contents.rootName = topFolder.getName() + '/';var files = topFolder.getFiles();var numFiles = 0;while (files.hasNext() && numFiles < 20) {var file = files.next();contents.children.push(fiile.getName());numfiles++;}return contents;}
This is an easy example about how can we deal with Google Services there. In this case, it is using the Drive App Service, that allows us to work with the Google Drive.
The script gets an initial folder. If we have passed the ID parameter, it uses getFolderById() function, else the getRootFolder() function. Then, it gets the folder file list (with getFiles) and loops its 20 first files, and gets the name of each one (with getName). It loads the list into an array object (contents.children), and returns the object.
Now, into the Javascript client side, if the macro ended ok, the updateDisplay function will be executed.
function updateDisplay(contents) {var headingText = 'Display contents for' + contents.rootName + ' folder:';$('main-heading').text(headingText);for (var i = 0; i < contents.children.lenght; i++) {$('#results').append('<div>' + contents.children[i] + '</div>');}}
This function collect the result array into the contents parameter, and loads the list into the page with a simple loop and some dynamic html construction.
Developing a new version
Now that we have seen how the script works, we’re going to add some new code to the example, in order to understand it a little bit better.
For example, we will add a button to create a new folder. This is not complicated.
First, we add a submit input into the HTML main page :
<input type='submit' id='id_add_folder_button' value='ADD NEW FOLDER' />
and in our init javascript function, we link a function to call when it’s clicked:
$(function() {$('#id_add_folder_button').click(fun_add_folder);…}
In the fun_add_folder javascript function, we have to call a new Google Script (addFolder) :
function fun_add_folder() {var fname = prompt('Folder name:', 'New folder');if ((fname != null) && (fname != '')) {$('#id_add_folder_button').attr('disabled', 'true');google.script.run.withSuccessHandler(function() {$('#id_add_folder_button').removeAttr('disabled'):}).withFailureHandler(function(msg) {$('#error-message').text(msg).addClass('error').show();$('#id_add_folder_button').removeAttr('disabled');}).addFolder(folderId, fname);}}
In order to avoid parallel requests, note that just after calling the function, the
In the Code.gs file, we must code the addFolder function as :
function fun_add_folder() {var fname = prompt('Folder name:', 'New folder');if ((fname != null) && (fname != '')) {$('#id_add_folder_button').attr('disabled', 'true');google.script.run.withSuccessHandler(function() {$('#id_add_folder_button').removeAttr('disabled'):}).withFailureHandler(function(msg) {$('#error-message').text(msg).addClass('error').show();$('#id_add_folder_button').removeAttr('disabled');}).addFolder(folderId, fname);}}
In this case, we have 2 input parameters (the folder parent ID, and the new folder name), and none for return.
We can create a new folder as easily as with calling the createFolder() function.
Now, we can try our new version with launching the /dev URL. However, this must be a provisional URL, to try the App while we’re developing. If we try to use the /exec URL, we will not see the changes, because before that, we must publish the new version of the Web App.
To get it, we must go to “Publish” – “Deploy as web app…”, and then choose a “New” Project version. It is advised to write a comment about the changes.
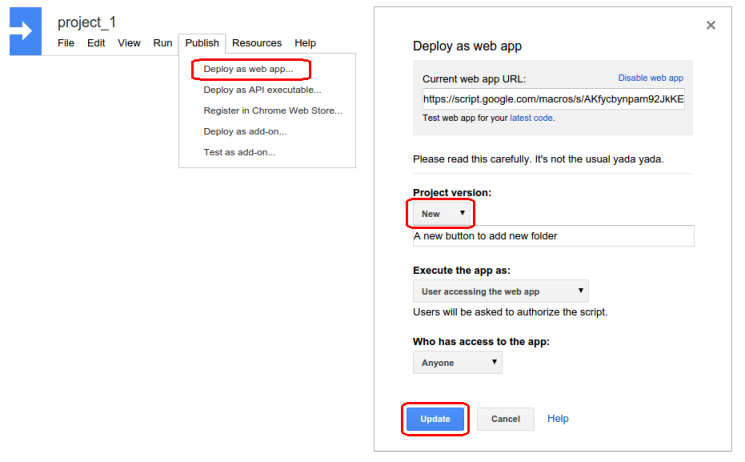
And finally, updating the project version we can use the /exec URL as well.